本文章使用的部署环境
操作系统:ubuntu 22.04
hugo的准备
本文章默认使用podman部署,他和docker的使用区别仅仅在于命令里把docker换成podman。
新建一个文件夹用来存放博客所有的内容
1
|
mkdir -p my_blog/themes
|
然后需要进去下载一个主题,并且使用这个主题提供的站点模板
1
2
|
cd my_blog/themes
git clone https://github.com/CaiJimmy/hugo-theme-stack.git
|
将站点模板拷贝到my_blog下面
1
|
cp -r hugo-theme-stack/exampleSite/* ../../my_blog/
|
这个时候站点就搭好了,我们要想办法将hugo启动起来
安装podman
然后输入下面的命令启动hugo服务器
1
|
podman run -it --name hugo -v $(pwd)/my_blog:/src -p 1313:1313 docker.io/klakegg/hugo:ext-ubuntu server
|
正常启动的话应该能看到这样的信息
 1
 2
 3
 4
 5
 6
 7
 8
 9
10
11
12
13
14
15
16
17
18
19
20
21
22
|
Start building sites …
hugo v0.105.0-0e3b42b4a9bdeb4d866210819fc6ddcf51582ffa+extended linux/amd64 BuildDate=2022-10-28T12:29:05Z VendorInfo=hugoguru

                   | ZH-CN
-------------------+--------
  Pages            |    28
  Paginator pages  |     0
  Non-page files   |     6
  Static files     |     0
  Processed images |    12
  Aliases          |    10
  Sitemaps         |     1
  Cleaned          |     0

Built in 243 ms
Watching for changes in /src/{assets,content,themes}
Watching for config changes in /src/config.yaml, /src/themes/hugo-theme-stack/config.yaml
Environment: "production"
Serving pages from memory
Running in Fast Render Mode. For full rebuilds on change: hugo server --disableFastRender
Web Server is available at http://localhost:1313/ (bind address 0.0.0.0)
Press Ctrl+C to stop
|
这个时候尝试一下连接hugo是否有反应,能返回个html就说明站点能正常访问了
1
2
3
4
5
6
7
|
root@hongdou:~# curl http://localhost:1313/
<!DOCTYPE html>
<html lang="zh-cn" dir="ltr">
<head>
<meta name="generator" content="Hugo 0.105.0"><script src="/livereload.js?mindelay=10&v=2&port=1313&path=livereload" data-no-instant defer></script><meta charset='utf-8'>
<meta name='viewport' content='width=device-width, initial-scale=1'><meta name='description' content='MtF/
...
|
因为我们经常需要重启hugo,所以写个脚本方便操作
在用户根目录创建个blog.sh文件,写入如下内容
1
2
3
4
|
#!/bin/sh
podman stop hugo || true
podman rm hugo || true
podman run -d --name hugo -e HUGO_ENV=production -v $(pwd)/my_blog/:/src -p 1313:1313 docker.io/klakegg/hugo:ext-ubuntu server
|
然后执行chomd +x blog.sh给他执行权限
以后只要输入./blog.sh就能自动重启了
如果想看执行的log来排错,可以输入podman logs hugo
nginx的准备(可选)
使用nginx可以让你一个80或者443端口转发到多个后端应用
例如我不光搭建了这一个blog,我还搭建了rancher和jumpserver,都走同一台服务器的80端口
如果不使用nginx的话,访问每个应用只能单独输入端口号,不能做到共用80端口
使用nginx很简单,先apt install nginx安装,然后新建个名为hugo的配置文件(你也可以取个别的名字)
1
|
vim /etc/nginx/sites-enabled/hugo
|
打入以下内容,注意需要把server_name后面的域名改成自己的域名
如果你的hugo后端开放的不是1313端口,就需要在upstream blog-default里修改server字段
 1
 2
 3
 4
 5
 6
 7
 8
 9
10
11
12
13
14
15
16
17
18
19
20
21
22
23
24
25
|
upstream blog-default {
  zone blog-default 64k;
  server 127.0.0.1:1313;
  keepalive 2;
}

server {
    listen 80;
    listen [::]:80;
    server_name blog.example.com;

    client_max_body_size 128M;

    location / {
      proxy_http_version 1.1;
      proxy_set_header "Connection" "";

      proxy_set_header Host $host;
      proxy_set_header X-Real-IP $remote_addr;
      proxy_set_header X-Forwarded-For $proxy_add_x_forwarded_for;
      proxy_set_header X-Forwarded-Proto $scheme;

      proxy_pass http://blog-default;
    }
}
|
弄好配置以后输入systemctl restart nginx来重启nginx即可生效
域名及Cloudflare的准备
使用Cloudflare可以隐藏服务器的真实IP避免遭受攻击,还可以自动配置SSL证书,因此本教程使用Cloudflare来隐藏服务器以及添加SSL加密。
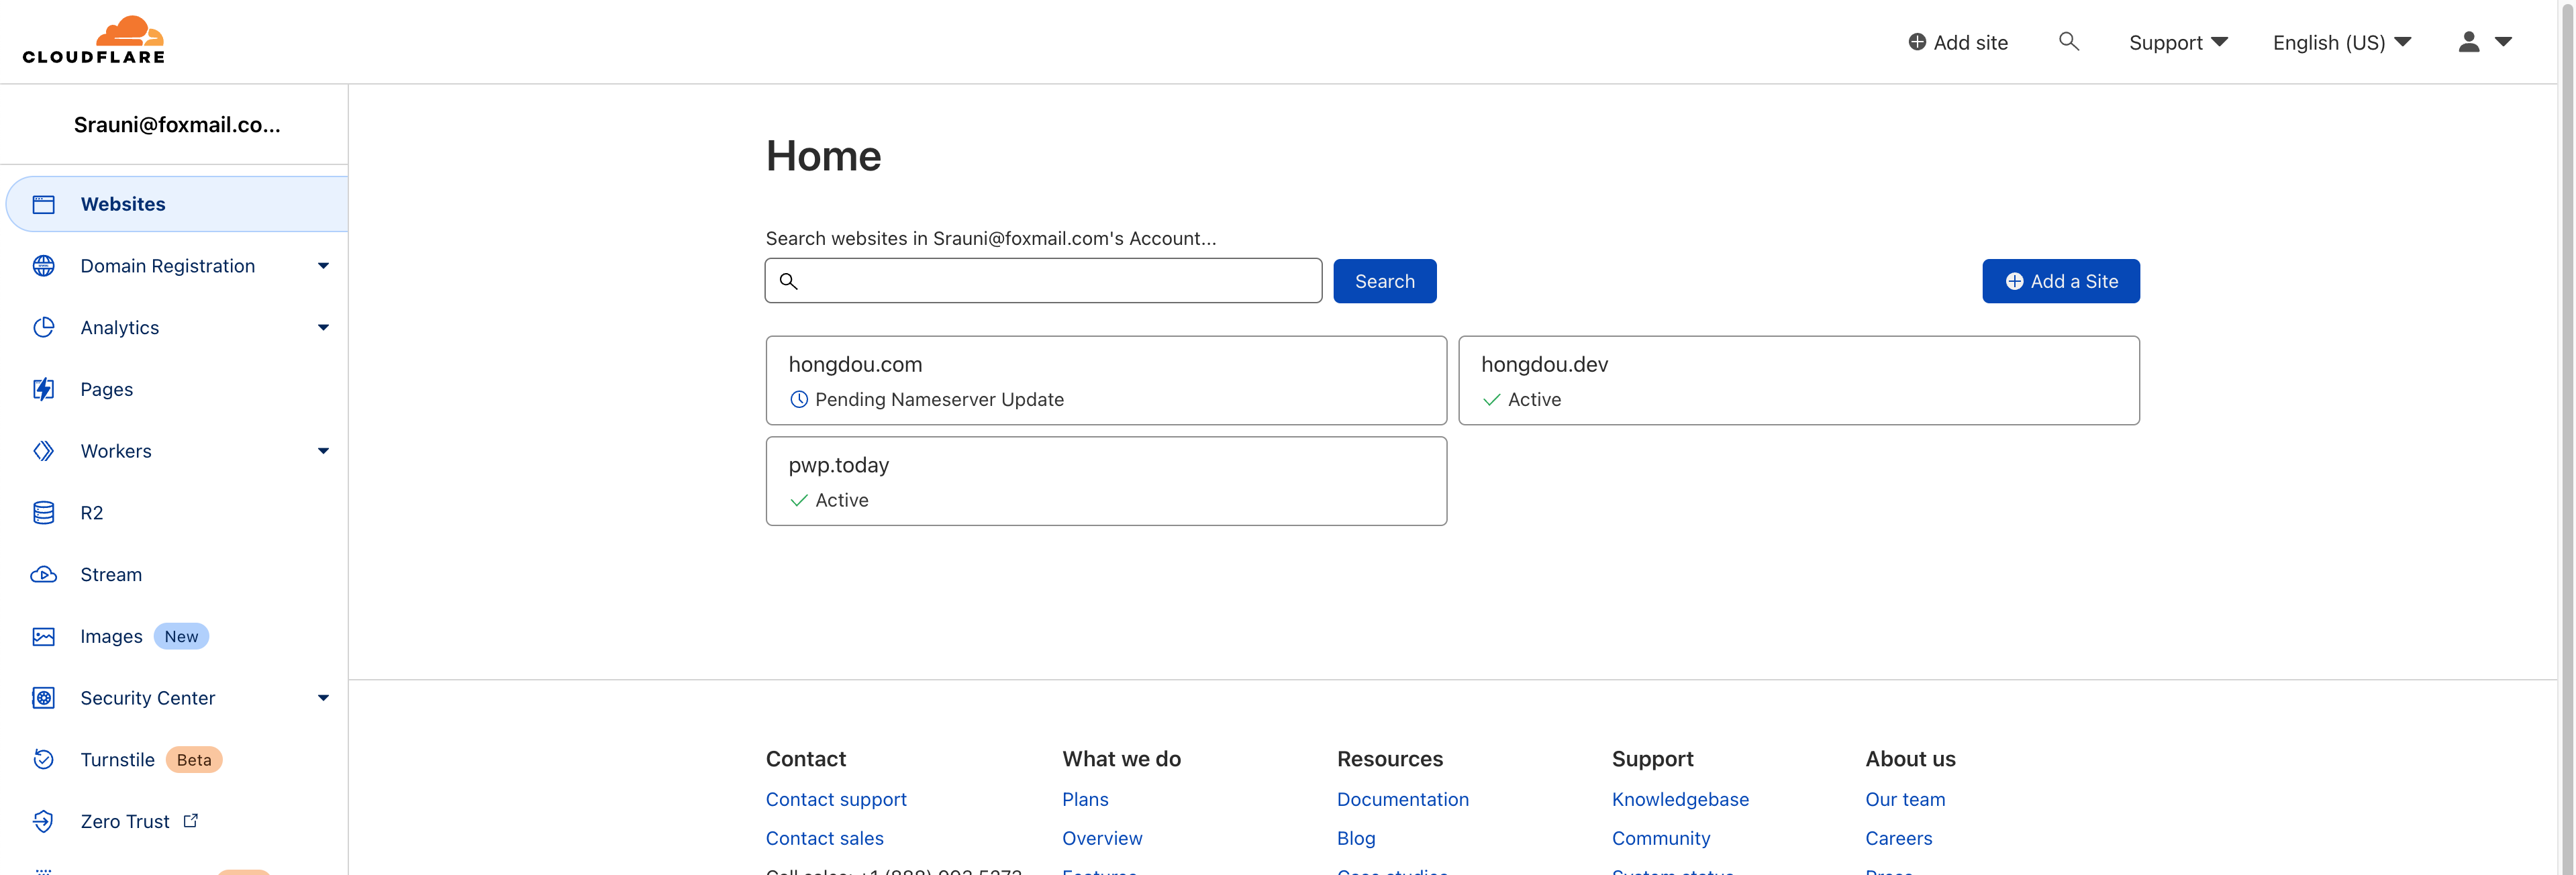
首先需要购买域名以及注册Cloudflare,我们这里假设已经做好了
在Cloudflare添加自己的站点,点击右边的Add a Site
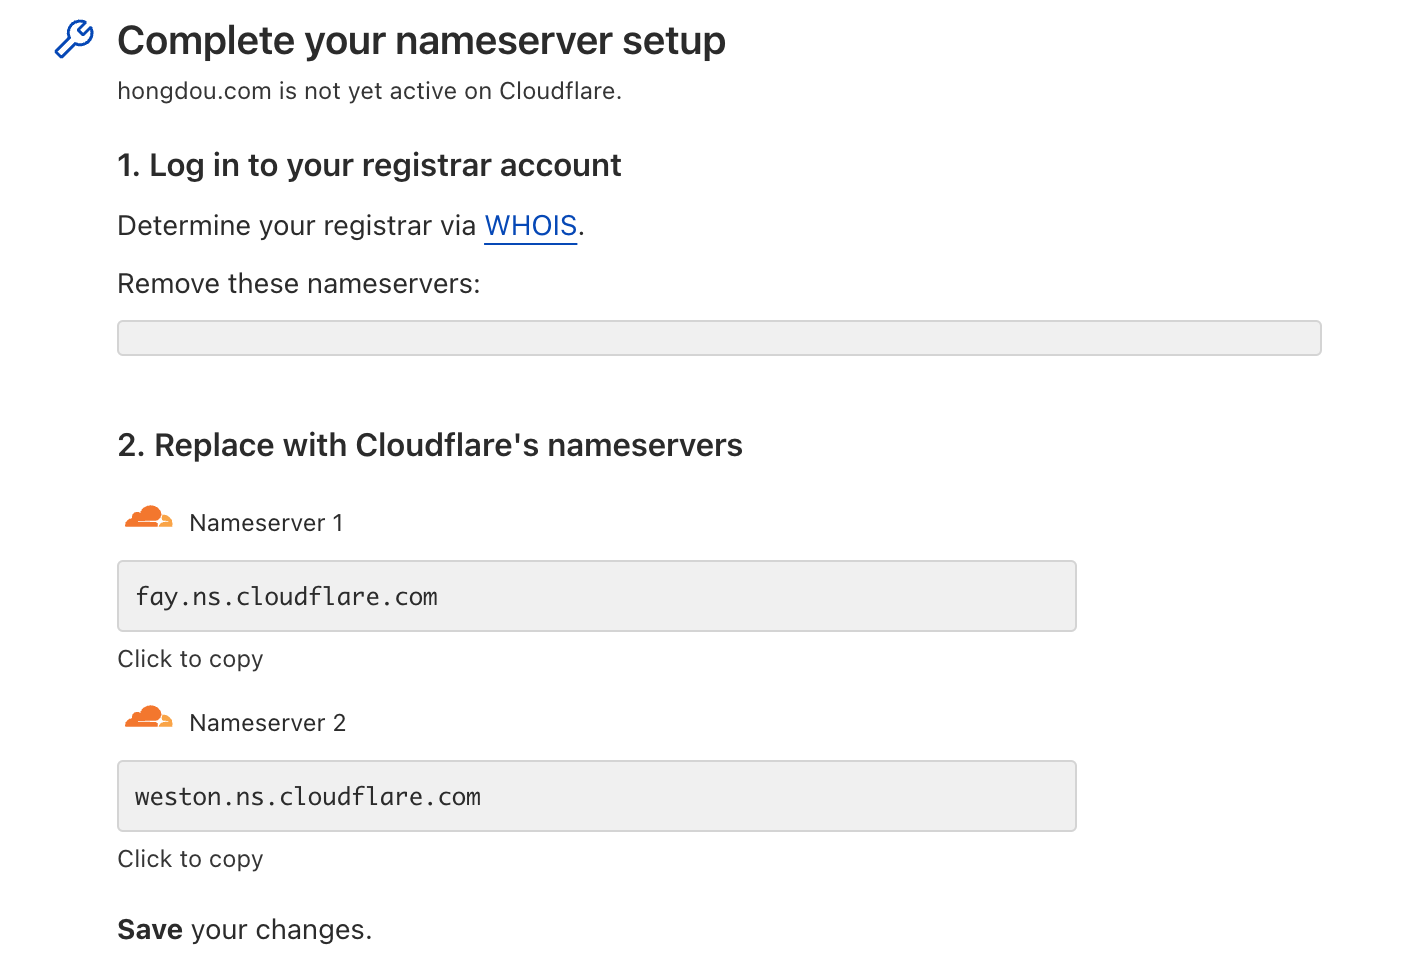
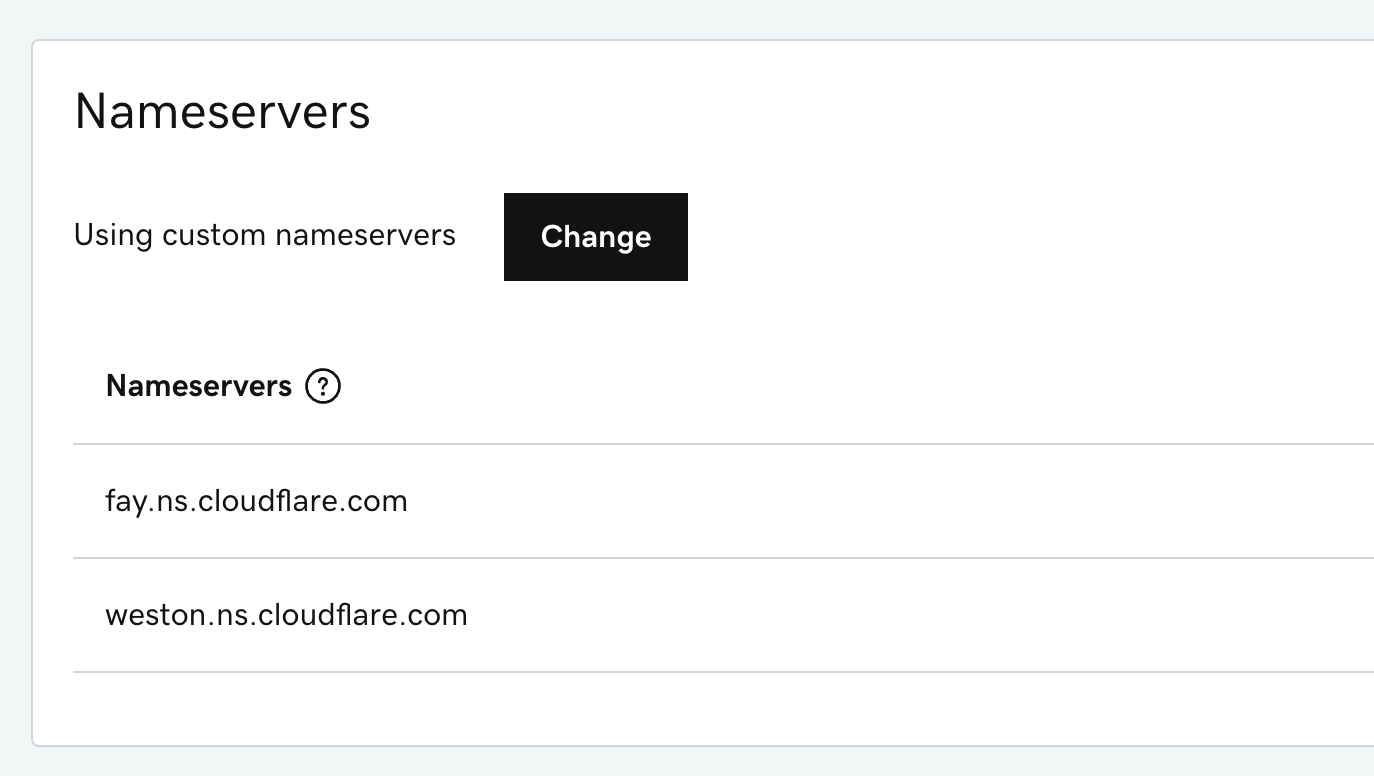
接着需要去域名提供商,将域名的Nameservers修改为Cloudflare提供的内容
等待Cloudflare成功验证域名之后,添加DNS记录,并且启用代理

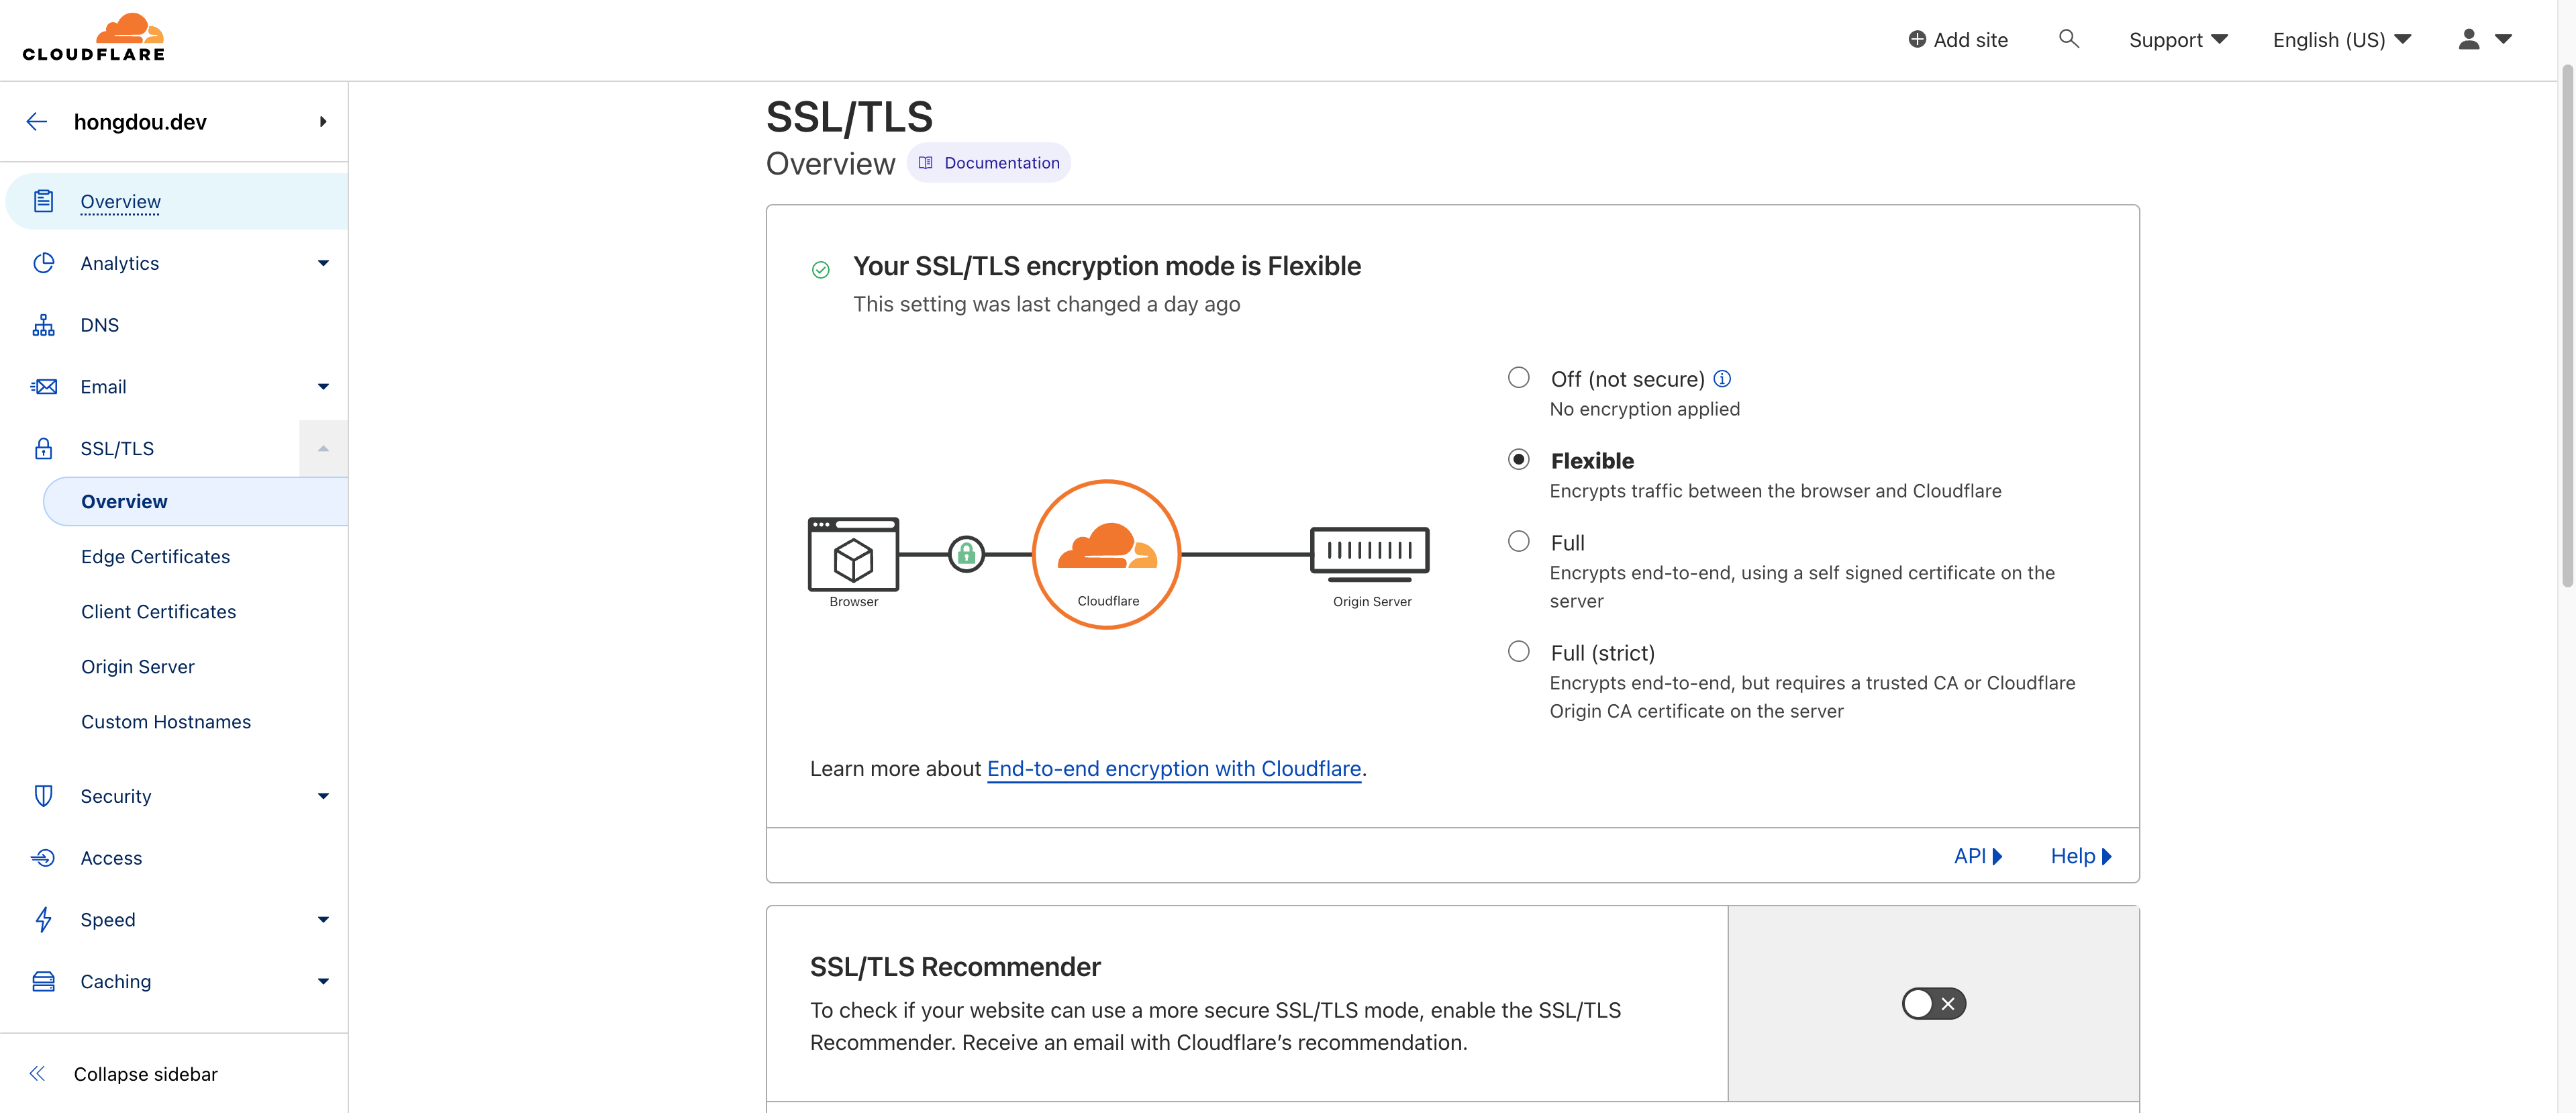
在SSL/TLS里选中Flexible,这会仅启用浏览器到Cloudflare之间的加密,默认是选上的
至此,博客已经可以用域名正常访问了!
修改博客配置以及发表新文章
修改博客配置
现在我们博客还是模板的样子,因此我们需要修改配置,配置文件在my_blog/config.yaml,进去以后根据自身情况来修改,我的配置是这样的
  1
  2
  3
  4
  5
  6
  7
  8
  9
 10
 11
 12
 13
 14
 15
 16
 17
 18
 19
 20
 21
 22
 23
 24
 25
 26
 27
 28
 29
 30
 31
 32
 33
 34
 35
 36
 37
 38
 39
 40
 41
 42
 43
 44
 45
 46
 47
 48
 49
 50
 51
 52
 53
 54
 55
 56
 57
 58
 59
 60
 61
 62
 63
 64
 65
 66
 67
 68
 69
 70
 71
 72
 73
 74
 75
 76
 77
 78
 79
 80
 81
 82
 83
 84
 85
 86
 87
 88
 89
 90
 91
 92
 93
 94
 95
 96
 97
 98
 99
100
101
102
103
104
105
106
107
108
109
110
111
112
113
114
115
116
117
118
119
120
121
122
123
124
125
126
127
128
129
130
131
132
133
134
135
136
137
138
139
140
141
142
143
144
145
146
147
148
149
150
151
152
153
154
155
156
157
158
159
160
161
162
163
164
165
166
167
168
169
170
171
172
173
174
175
176
177
178
179
180
181
182
183
184
185
186
187
188
189
190
191
192
193
194
195
196
197
198
199
200
201
202
203
204
205
206
207
208
209
210
211
212
213
214
215
216
217
218
219
220
221
|
baseurl: https://blog.hongdou.dev
languageCode: zh-cn
theme: hugo-theme-stack
paginate: 5
title: 红豆豆的猫窝

# Change it to your Disqus shortname before using
disqusShortname:

# GA Tracking ID
googleAnalytics:

# Theme i18n support
# Available values: ar, bn, ca, de, el, en, es, fr, hu, id, it, ja, ko, nl, pt-br, th, uk, zh-cn, zh-hk, zh-tw
DefaultContentLanguage: zh-cn

# Set hasCJKLanguage to true if DefaultContentLanguage is in [zh-cn ja ko]
# This will make .Summary and .WordCount behave correctly for CJK languages.
hasCJKLanguage: false

permalinks:
    post: /p/:slug/
    page: /:slug/

params:
    mainSections:
        - post
    featuredImageField: image
    rssFullContent: true
    favicon:  # e.g.: favicon placed in `static/favicon.ico` of your site folder, then set this field to `/favicon.ico` (`/` is necessary)

    footer:
        since: 2020
        customText:

    dateFormat:
        published: Jan 02, 2006
        lastUpdated: Jan 02, 2006 15:04 MST

    sidebar:
        emoji: 🍥
        subtitle: MtF/GO运维开发/加密货币/人工智能
        avatar:
            enabled: true
            local: true
            src: img/avatar.png

    article:
        math: false
        toc: true
        readingTime: true
        license:
            enabled: true
            default: Licensed under CC BY-NC-SA 4.0

    comments:
        enabled: false
        provider: disqus

        disqusjs:
            shortname:
            apiUrl:
            apiKey:
            admin:
            adminLabel:

        utterances:
            repo:
            issueTerm: pathname
            label:

        remark42:
            host:
            site:
            locale:

        vssue:
            platform:
            owner:
            repo:
            clientId:
            clientSecret:
            autoCreateIssue: false

        # Waline client configuration see: https://waline.js.org/en/reference/component.html
        waline:
            serverURL:
            lang:
            pageview:
            emoji:
                - https://unpkg.com/@waline/[email protected]/weibo
            requiredMeta:
                - name
                - email
                - url
            locale:
                admin: Admin
                placeholder:

        twikoo:
            envId:
            region:
            path:
            lang:

        # See https://cactus.chat/docs/reference/web-client/#configuration for description of the various options
        cactus:
            defaultHomeserverUrl: "https://matrix.cactus.chat:8448"
            serverName: "cactus.chat"
            siteName: "" # You must insert a unique identifier here matching the one you registered (See https://cactus.chat/docs/getting-started/quick-start/#register-your-site)

        giscus:
            repo:
            repoID:
            category:
            categoryID:
            mapping:
            lightTheme:
            darkTheme:
            reactionsEnabled: 1
            emitMetadata: 0

        gitalk:
            owner:
            admin:
            repo:
            clientID:
            clientSecret:

        cusdis:
            host:
            id:
    widgets:
        homepage:
            - type: search
            - type: archives
              params:
                  limit: 5
            - type: categories
              params:
                  limit: 10
            - type: tag-cloud
              params:
                  limit: 10
        page:
            - type: toc

    opengraph:
        twitter:
            # Your Twitter username
            site:

            # Available values: summary, summary_large_image
            card: summary_large_image

    defaultImage:
        opengraph:
            enabled: false
            local: false
            src:

    colorScheme:
        # Display toggle
        toggle: true

        # Available values: auto, light, dark
        default: auto

    imageProcessing:
        cover:
            enabled: true
        content:
            enabled: true

### Custom menu
### See https://docs.stack.jimmycai.com/configuration/custom-menu.html
### To remove about, archive and search page menu item, remove `menu` field from their FrontMatter
menu:
    main: []

    social:
        - identifier: github
          name: GitHub
          url: https://github.com/sukidesuka
          params:
              icon: brand-github

        - identifier: twitter
          name: Twitter
          url: https://twitter.com/ahodewanai
          params:
              icon: brand-twitter

related:
    includeNewer: true
    threshold: 60
    toLower: false
    indices:
        - name: tags
          weight: 100

        - name: categories
          weight: 200

markup:
    goldmark:
        renderer:
            ## Set to true if you have HTML content inside Markdown
            unsafe: false
    tableOfContents:
        endLevel: 4
        ordered: true
        startLevel: 2
    highlight:
        noClasses: false
        codeFences: true
        guessSyntax: true
        lineNoStart: 1
        lineNos: true
        lineNumbersInTable: true
        tabWidth: 4
|
发布新文章
发布新文章需要进入my_blog/content/post,然后新建一个文件夹,例如my-first-post
然后在my_blog/content/post/my-first-post里新建一个index.md,里面填入如下内容
 1
 2
 3
 4
 5
 6
 7
 8
 9
10
11
12
|
---
title: 我的第一篇文章
description: 简短的介绍,可以不写
date: 2022-11-15
slug: my-first-post
image:
categories:
    - 未分类
draft: false
---

我有blog啦
|
注意slug只是这篇文章的网页路径,可以不填,就会默认和title一样,image是文章的背景图,draft设置为false就会在blog显示这篇文章,设置为true就不会显示
更多示例可以看示例站点本身自带的文章
然后重启hugo容器就好啦